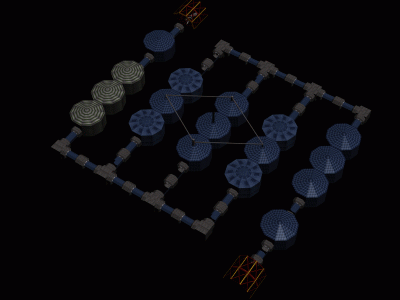
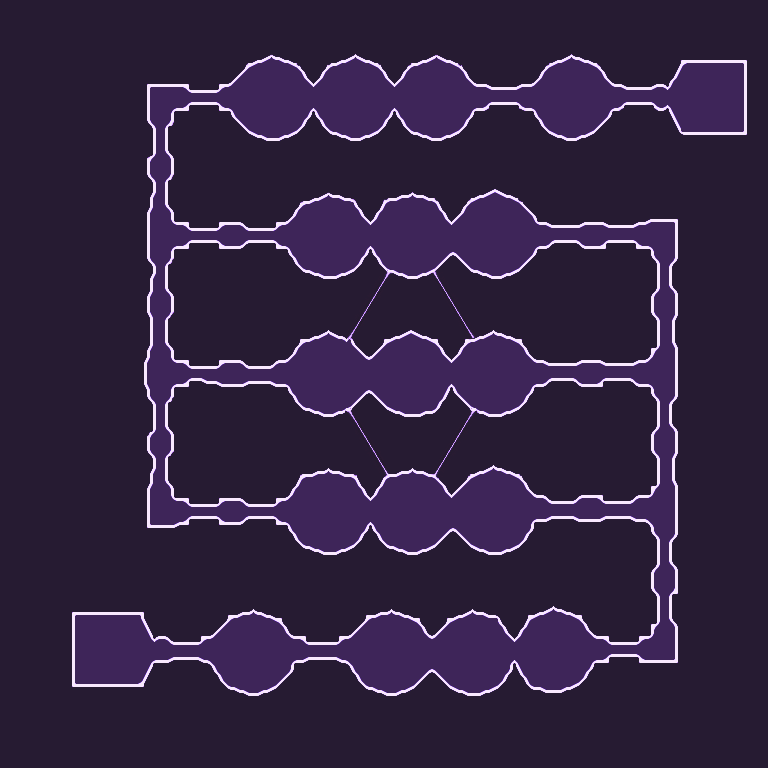
| Mission index (for /m param): | 088 |
| City name on PC: | Orbital Station |
| Map and level files (PC): | map011.mad, c011l001.dat, |
| PC Campaign: | Eurocorp mail 20 |
| Citydrop code name: | High Sierra |
| First objective: | Get shuttle nav computer |

Message Type: DIRECT
Priority: 1
Message begins:
Orders
Colombo: Retake control of the orbital elevator facility. Additional operatives will be on site to assist.
Vissick himself has escaped but his rebellion is over. He and a few others will die in the toxic
wilderness beyond city perimeters. When we have finished dealing with the Church, we can mount a
search for the bodies.
I have deciphered the coded orders Anika-Mirabelle was carrying when you terminated her. She was
scheduled to rendezvous with the cult's leadership - the Nine - in Sri Lanka. The Church has taken over the Orbital Elevator at Colombo. From there, they could take control of the
Moon.
Professor Drennan fears that the Nine have plans to carry into practice some of the theories set out in the Codex.
Namely, to enhance the power of the experimental ionospheric re-calibration equipment being developed
by scientists at the Amundsen Research Colony on the surface of the Moon, and to use it as a weapon.
Reports from other AIs indicate a global reduction in zealot activity, suggesting that their Cataclysm might be about to happen.
London Artificial Intelligence
see REF 20 part I
This Mission is not difficult, but you'll have to use your brains here. There are some terminals here you will have to use. Almost every Epoch agent here carries high explosives. The station may not be destroyed: you will have to pick up every explosive you'll encounter. So if you are carrying some explosives yourselves, drop them first and see to it that all your four agents have space for one extra weapon. One more technical hint: I always pushed the B button in this mission. It speeds up the game. Only this mission was a little bit too complex for my CPU (I own a Pentium at 90 MHz) because of the moving stars at the background. It is also a lot easier this way to spot the agents.
You must use the plasma lance in all the battles that I describe from now on. Your first objective is to get the navigational computer on the outer left corridor. Take out the four agents (and take their explosives) on your way to the computer. Pick it up. There's a little car driving in the station. NEVER NEVER NEVER DESTROY IT. It will not bother you, but when it gets destroyed, the orbital station will blow up some minutes later.
Your second objective is to secure the orbital station because the self-destruct sequence has been activated. There are two remaining corridors, which both have a terminal at the end. The other two terminals can't be reached yet because they are blocked with a timegate, located in the corridor you were dropped in initially. To disable the timegate, and also to disable the self-destruct sequence, you must have one agent at every terminal. So it's time to split up. The first terminal is blocked with a spider. Four blasts with the plasma lance and the spider is no more. Leave one agent behind the terminal. (You're close enough to manipulate it if you'll see a short movie-sequence.) The three remaining agents can go to the second terminal on the outer right corridor. Don't get too close to this agent because it's armed with a flamer. Leave an agent behind the terminal. The other two agents can now take the corridor where you were dropped initially, because the timegate has been deactivated by those two terminals.
Take out the Zealot you encounter in that corridor. You can't go to the right because another timegate blocks your way. To the left there's another terminal. Take out the Zealot guarding it there and leave one agent behind. The timegate is gone now, and the only agent that's free (in other words: which is not attached to a terminal yet) can go the last terminal on the right. When your four agents are in position, a short movie-sequence will take the view to the left, and show another terminal guarded by two Epoch agents. You can group your team again now and walk towards this new terminal. Kill the Epoch agents guarding it (one of the few which are not carrying explosives). The self-destruct sequence is cleared as soon as you reach this last terminal.
One objective left: there's a shuttle to take you to the moon, but it's guarded. First take out the three Epoch agents you'll encounter in this corridor. Then there are two laser-guided stations. Destroy it with the plasma lance. A little bit further, a timegate is blocking your way. There's an Epoch agent using a terminal, unfortunately just behind the timegate so you can not reach it. You will have to kill him from far. This is why you had to carry those long-range rifles. Take him out. He will drop an explosive. Wait until the timegate is gone and pick up the explosive in time. It's a matter of timing, and it will take you some replaying to get this right.
There's one terminal left at the end of this corridor. Go to it, and wait for the shuttle. Up to part 3!
Message ends.
Surveillance simulation
Results standard deviation: Very low
New research: none
New weapons: none
Possible loot: none
Mission peculiarity: Second of 3 missions bound together
That's another mission where Clone Shields will help a lot.
A new mechanic is also untroduced - terminals. A terminal basically work as a switch, doing something when your agent stands close, and stopping the effect as soon as you get away.
Sight radius for Zealots on this level isn't very large, but make sure you're far enough every time you deactivate your Clone Shields.
While nothing stops you from going through this level with firepower, it is far easier to hide behind Clone Shields and eliminate only those which you really have to..
Almost everyone on this level has a High Explosive. Every time you kill someone, you have to pick it up to prevent destruction of the whole station. Make sure you have free slots for pickups - you may want to drop some weapons you won't use, and later pick them up again before concluding the mission.
You will definitely have to kill the Zealot with control computer, and the one close to him. If you switch from Clone Shields to weapons from behind these two, the Zealot from L-corridor won't notice anything. Kill them and quickly pick up the bombs.
Then you need to activate two of the terminals. One has a Laser Spider bot near to it - destroy it just to be safe. The second terminal has a Zealot nearby, but if you stand near to the terminal, he will not notice you.
When the two terminals are active, you can take remaining two agents to the other side of the station, and activate terminals #3 and #4 (you get access to #4 after #3 was activated). Zealots are far away from terminals on this side, so you don't have to eliminate them.
Activating all 4 terminals simultaneously causes the four Displacertron Gates (and other security mechanisms near them) to be permanently disabled.
Now sneak to the corridor with Self-destruct control terminal. The Zealots guarding it have no High Explosives, so it is safe to kill them from distance with LR Rifles. When you reach the terminal, your objective will change - self-destruct has been disabled.
But that was the easier part of this mission. Now you need to sneak into upper corridor, and kill the Zealots there. The two will start charging at you as soon as you reach the place where Displacertron Gate 4 was. Back off a bit, kill them and take the explosives. When the two are dead, the last zealot will charge at you as well. He doesn't have a bomb.
The Creberus IFFs you can take from a distance with LR Rifles. Then go close to Displacertron Gate 5, but be careful not to fall into it. From that position, snipe the Zealot with Life Support module.
There's a tricky situation there. The Zealot has a bomb. If it explodes, game over. You need to pick it up, but there is a very short time window for that - the Displacertron Gate 5 will open after he's killed, but with some delay.
When the High Explosive is disarmed, you're done. You will finish the level by going further into the shuttle corridor.
This time you will get proper "mission complete" message, and only after pressing space the mission will move to third part. Before you do, make sure you didn't left any weapons to make room for the bombs. Prepare your equipment before you go.
Additional hints
If you destroy the service car circulating the station, its driver will run away, and then drop an armed explosive, destroying the station. So either handle the driver, or don't shoot that car at all.
Destroying the terminals doesn't affect their function - you still have to stand at the place where they were to keep them disabled..
Remember your keyboard shortcuts. 'Z' drops a weapon without activating it (you can drop bombs without exploding). 'B' removes buildings from the view - you will want to have it pressed throughout the whole level.
Terminals do not react to your agent proximity if you have Clone Shield active.
Do not leave your agents near terminals with drugs administered - they will shoot the service car on sight, and that leads to destruction of the station.
The game has a bug, where in some circumstances your agents refuse to pick up bombs even if you have a free slot. This is especially irritating on this level - you are expected to be very precise with time, and even if you do everything perfectly, you can still lose due to this bug. It is speculated that having exactly one bomb in inventory of every agent at start of the mission may prevent that bug from happening.
This is Orbital Station AI non-official message, please do not reply.

⨁ Start point
⨁ Orbital Elevator exit
⨁ Temporar generators
⨁ Zealots with High Explosives
⨁ Zealot with control computer, Plasma Lance and HE
⨁ Zealots with Plasma Lances only
⨁ Laser spider bot
⨁ Deployed Cerberus IFFs
⨁ Displacertron Gate 1
⨁ Gate 1 control terminals
⨁ Displacertron Gate 2
⨁ Gate 2 control terminal
⨁ Displacertron Gate 3 & 4
⨁ Gate 3 & 4 control terminal
⨁ Self-destruct control terminal
⨁ Displacertron Gate 5
⨁ Gate 5 control terminal
⨁ Zealot with Life Support module
⨁ Shuttle craft access