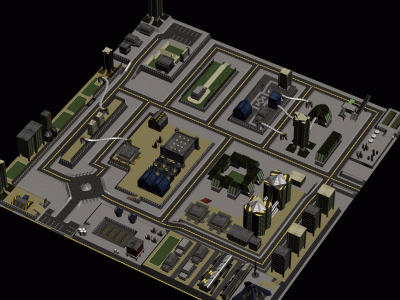
| Mission index (for /m param): | 011 |
| City name on PC: | Johannesburg |
| Map and level files (PC): | map022.mad, c022l002.dat, |
| PC Campaign: | Church of N. Ep. mail 08 |
| Citydrop code name: | Serpent's Egg |
| First objective: | Assist Acolytes |

Receive our blessings, Son of Light.
By working where our foe is weakest, we have begun to establish our Church. The Syndicate is therefore attempting to regain control in a number of vulnerable cities.
Already, the Syndicate has begun to undertake covert operations in Johannesburg, Buenos Aires, Santiago and Tripoli. Those who challenge the Church of the New Epoch must join us or perish.
Syndicate agents have been sighted in Santiago and Tripoli. In Buenos Aires, the Syndicate has regained control of its garrison in an action which spilled the precious blood of your brothers and sisters stationed there. The Nine also believe that EuroCorp has planted a saboteur in our mission in Johannesburg.
Your Acolytes must ensure that no EuroCorp operative succeeds or ever returns to the Syndicate. Do not rest until you have cleansed these places of the Syndicate's sickness.
The day of reckoning draws closer with every new mind we recruit. And those who wish to survive the Cataclysm must believe.
Be brave, Acolyte. And be brutal. It is the only way.
Virgil
There is pleasure in stealing the souls of machines.
- The Book of Cataclysm.
This mission is a straight fight with allies against roughly equal odds, and it mostly comes down to how you micromanage.
There are Unguided roaming the streets here, and you should probably kill as many of them as you can to aid your brethren, but the real fight comes once you enter the compound manned by the Zealots. A large Eurocorp force arrives in multiple flying cars. I have always stayed near to where I entered the compound and fought off the agents there before proceeding to wipe out any stragglers, but provided you shoot well and switch between weapons (use your miniguns while waiting for rifles to reload).
Activate supershields if you're under heavy fire, and focus fire on individual agents. You should come out triumphant.
There are a pair of scientists in this compound; if you are fortunate or very skilled, they may have survived. If so, persuade them. Get in one of the abandoned Syndicate APCs and head back to the IML link.
You will be greeted by a force of recently-arrived agents who are stringing razor wire across the entrance. Fortunately, the game doesn't care what altitude you are at when you're over the evac zone, so if you stole a flying car earlier you can fly to the exit point. If you didn't, kill the four agents here (again, LR Rifles are the way forward) and steal their one.
Prophecy transcript
Resolution uncertainty: Very low
New research: Clone Shield
New weapons: none
Possible loot: 1 Scientist, 10+ Agents
This level isn't hard, but it is quite chaotic if you didn't know how it works.
There are 3 Unguided cars on the level. The Unguided will exit a car if it passes near you. Use it for your advantage. Stay close to the road, and run away when the Unguided exit. When they follow you and distance themselves from the car, snipe them.
As soon as you exit the IML Ststion, the Agents group ① will use the Transport Tubes and move towards you. Only 3 Agents, you'll kill them easily.
Then, nothing more will happen until you trigger the areas on the ramp to Zealot base. Before you do, you have time to perpare.
The first thing that will get triggered when you go up the ramp will be spawning of 5 Agents at ②. The Agents will then use the Transport Tube, and start killing Zealots.
You can easily interfere with the plan at ②, by destroying the Transport Tube the Agents use. If you have Launchers, shoot the tube entrance from the street below. It will fall, requiring circa 12 rockets. If you don't have that, use the Transport Tube yourself - enter into one at top of the level, leave a bomb to destroy the second tube and use it to transport yourself to the Zealot base. You may do this with one Agent - the rest may either wait within the base, or outside - doesn't matter that much.
Destroying the Transport Tube will often cause fire in the place where the entrance was. If you'd like to persuade those Agents later, you have to wait for this fire to end. Otherwise, the Agents will get burned, and there will be noone to persuade.
If you got inside the base through the tube, don't move much, as it's very easy to trigger the saboteur.
Now let's explain the saboteur. It's one of the scientists - you can't persuade him, and he will try to blow up the base when triggered. He will do that by placing 3 High Explosives within the base. If you're inside the base, you want to deal with him before using the ramp to trigger Eutocorp vehicle assault, and getting close to ④ will trigger him. If you're outside, you should handle Eurocorp vehicle assault first, and then go inside the Zealot Base. He will start planting bombs when you go up the ramp and switch direction - as marked on the map.
You can kill the saboteur before he places all bombs, but it might be better to wait and pick up the bombs. They are useful, and easy to pick when you know exactly where they will be planted. After 3 bombs are placed, the saboteur will become harmless. You will still be unable to persuade him, and you will have to kill him to complete the mission objectives. The other Scientist is "normal", and you can persuade him so he joins your research team.
We were mentioning Eurocorp vehicle assault. That's the second trigger on the ramp to Zealot base. Three cars will spawn at ③, of which two are of flying variety. They will then move to positions at ④, where Agents will exit and attack you. Two cars will become completely empty, while 3rd one (the one furthest from the ramp) will leave the driver inside. If you didn't triggered the saboteur before that assault, don't go inside the Zealot base to fight the Agents. Your brethen will take care of them, and some Agents will actually exit the base and go to attack you.
One Flying Car will sit empty after the assault. Use it to persuade a little crowd, you may get quite a lot of Agents in this mission. Capture those waiting near damaged Transport Tube, and those waiting for you at IML Station. At the station, you can also find another empty flying car, in case the first one gets dangerously damaged.
The evac ambush flying car ⑥ will spawn at some point during the fight with Eurocorp vehicle assault. It will land near the IML Station at ⑦, and four Agents will use Razor Wire at the IML Station entrance. So go through that entrance with modded Agent, or just fly to the evac point.
Tech ex machina
Agents are armed with Pulse Lasers. Unguided are armed with Miniguns.
Two of Unguided cars have 3 people inside, the third has 4.
A building ⑤ will get destroyed at some point of the vehicle assault. The action is nowhere close that building, so it won't affect your plan.
You shouldn't have much issues fighting the Agents from vehicles; but if you do, you can make the road car go away by placing an Ion Mine at its spawn point, or on its road towards the final park place.
You were blessed by this premonition from Johannesburg episkopy, please do not reply.

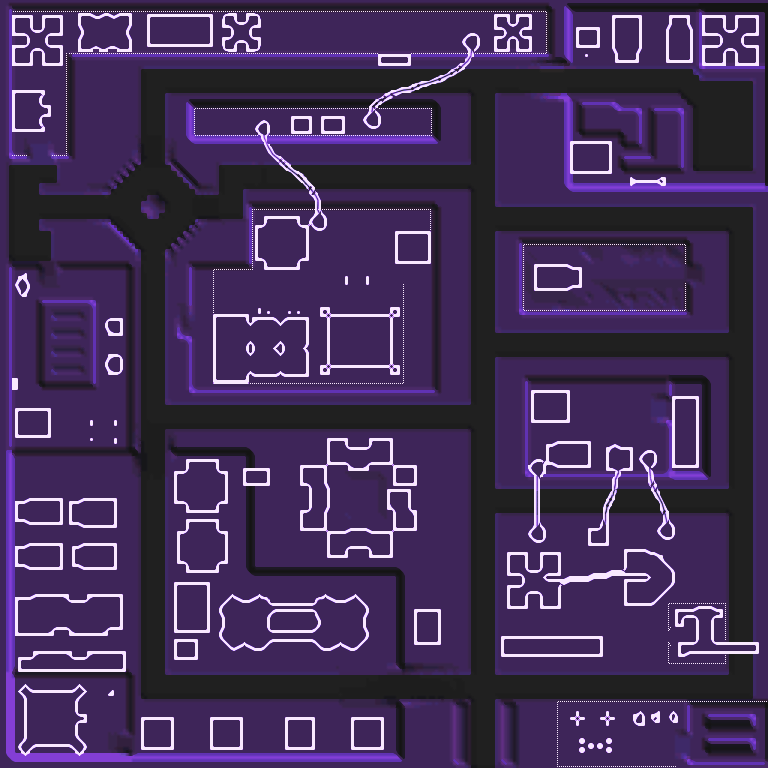
⨁ Start point
⨁ Zealots
⨁ Scientists
⨁ Unguided cars
① Group of 3 Agents
② Group of 5 Agents spawn point
③ Flying cars with Agents spawn points
③ Armored car with Agents spawn point
④ Flying cars with Agents landing sites
④ Armored car with Agents parking site
⑤ Building demolished for no reason
⑥ Evac ambush flying car spawn point
⑦ Evac ambush flying car landing site
 ̄ Agent assault trigger lines
| Scientist saboteur trigger line
①②③ Scientist saboteur bomb planting spots
⨁ Bank (empty)